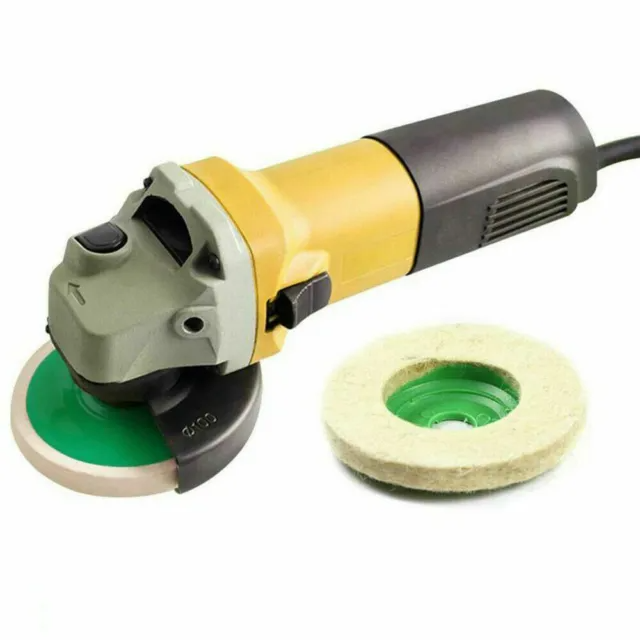
How to Use Wool Felt Polishing Wheels
Wool felt polishing wheels are an indispensable tool for achieving a pristine, mirror-like finish on a wide range of surfaces, including metal, jewelry, woodworking projects, and glass. Whether you’re a seasoned professional or a hobbyist, understanding how to properly use wool felt polishing wheels can significantly enhance the quality of your work. In this guide, we’ll walk you through everything you need to know to get the best results from your wool felt polishing wheels.
1. Selecting the Right Wool Felt Polishing Wheel
The first step in the polishing process is choosing the correct wool felt polishing wheel for your specific task. The performance of the polishing wheel greatly depends on its size, density, and type, so it’s crucial to select the one that best suits your project.
- Size: Wool felt polishing wheels come in various sizes, so it’s important to choose one that fits your rotary tool, bench grinder, or polishing machine. Larger wheels are ideal for covering broad surfaces, while smaller wheels are better for detailed work.
- Density: The density of the wool felt wheel determines its firmness. Softer wheels are gentle on delicate surfaces like gold, silver, and softer woods, while harder, denser wheels are more effective on tougher materials such as steel, brass, and glass. Understanding the material you’re working with will help you select the right density to avoid damaging the surface.
- Type: Wool felt polishing wheels come in different shapes, including flat, tapered, and cylindrical. Flat wheels are versatile and can be used on a variety of surfaces. Tapered wheels are perfect for polishing tight corners and edges, while cylindrical wheels are ideal for polishing round objects or inside grooves.
Selecting the appropriate wheel type ensures that you have the best tool for the job, allowing you to achieve an even and consistent finish.
2. Preparing Your Work Area
Once you’ve selected the right wool felt polishing wheel, the next step is to prepare your work area. A well-organized workspace is key to successful polishing.
- Cleanliness: Ensure your workspace is clean and free of any debris that could contaminate the surface you’re polishing. Any dust or dirt could scratch the surface or interfere with the polishing compound.
- Lighting: Good lighting is essential for polishing tasks, as it allows you to clearly see the surface and the progress of your work. Make sure your work area is well-lit to spot any imperfections that need additional attention.
- Safety Gear: Polishing can create dust and small particles, so it’s important to protect yourself. Always wear safety goggles to shield your eyes from flying debris, and a dust mask to prevent inhaling fine particles. If you’re working with loud machinery, consider wearing ear protection as well.
3. Attaching the Wool Felt Polishing Wheel
Attaching the wool felt polishing wheel correctly to your tool is crucial for effective polishing and your safety. Here’s how to do it:
- Rotary Tool: If you’re using a rotary tool, select the appropriate mandrel for your wool felt wheel. Slide the wheel onto the mandrel and tighten the screw to secure it in place. Ensure the wheel is firmly attached to prevent it from coming loose during operation.
- Bench Grinder or Polishing Machine: For bench grinders or larger polishing machines, mount the wool felt wheel onto the spindle and secure it with the appropriate nuts or flanges. Check that the wheel is balanced and spins smoothly before turning on the machine.
Taking the time to properly attach the wheel prevents accidents and ensures a smooth polishing process.
4. Applying Polishing Compound
To achieve a mirror-like finish, you’ll need to apply a polishing compound to the wool felt wheel. Polishing compounds come in different grades and colors, each designed for specific materials and polishing stages.
- Choosing the Right Compound: Select a compound that matches the material you’re working with. For instance, a green compound is ideal for stainless steel, while a red rouge is perfect for gold and silver. The compound should also match the stage of polishing, whether it’s cutting, buffing, or finishing.
- Application: Apply the polishing compound to the wool felt wheel by gently pressing the compound stick against the spinning wheel. The friction will cause the compound to melt slightly and transfer onto the wheel. Apply just enough compound to cover the surface without overloading it, as too much compound can lead to uneven polishing.
Properly applying the compound ensures that the wheel can effectively remove scratches and bring out a high shine on your workpiece.
5. Polishing the Surface
With your wool felt polishing wheel attached and the compound applied, you’re ready to begin polishing. Here’s how to do it:
- Speed: Start by setting your tool to a moderate speed. High speeds can cause the polishing wheel to heat up and potentially burn the surface, while too low a speed may not be effective in polishing. Adjust the speed based on the material and the condition of the surface.
- Pressure: Apply light to moderate pressure when polishing. Let the wheel and compound do the work, rather than forcing the tool against the surface. Excessive pressure can lead to uneven polishing or even damage the workpiece.
- Technique: Move the polishing wheel in a consistent, circular motion across the surface. Avoid staying in one spot for too long, as this can create heat buildup and lead to burns or discoloration. Work systematically, covering the entire surface evenly.
Polishing requires patience and precision. Take your time and inspect your work frequently to ensure you’re achieving the desired finish.
6. Cleaning the Surface
After polishing, it’s important to clean the surface to remove any residue left by the polishing compound.
- Wiping Down: Use a clean, soft cloth to wipe down the surface, removing any excess compound or debris. Microfiber cloths are ideal for this task as they won’t scratch the surface.
- Inspecting: Check the surface under good lighting to ensure that all scratches have been removed and the finish is even. If necessary, repeat the polishing process to address any remaining imperfections.
Regular cleaning during the polishing process prevents the buildup of compound residue, which can dull the final finish.
7. Storing and Maintaining Your Wool Felt Polishing Wheels
Proper care and maintenance of your wool felt polishing wheels will extend their lifespan and ensure consistent results.
- Cleaning the Wheels: After each use, clean the wool felt wheel by running it against a wheel rake or a stiff wire brush. This removes any embedded compound and keeps the wheel’s surface fresh for the next use.
- Storage: Store your wool felt polishing wheels in a clean, dry place, away from dust and moisture. If possible, keep them in a dedicated container to prevent them from being contaminated by other materials.
Maintaining your polishing wheels ensures they remain effective and ready for your next project.
Conclusion
Wool felt polishing wheels are a versatile tool that can achieve professional-quality finishes on a variety of materials. By selecting the right wheel, preparing your work area, properly attaching the wheel, applying the correct polishing compound, and using the right technique, you can achieve a smooth, mirror-like finish every time. With proper care and maintenance, your wool felt polishing wheels will serve you well for countless projects, ensuring that your work always shines.


