Title: Understanding the Usage of Wool Felt Polishing Wheel
Introduction:
In the world of metalwork and craftsmanship, achieving fine finishes is just as significant as correctly constructing the product. To accomplish high-end finishes, a proper understanding of polishing tools, specifically wool felt polishing wheels, is essential. This blog aims to provide you with a comprehensive guide on how to effectively use a wool felt polishing wheel.
Overview of Wool Felt Polishing Wheel:
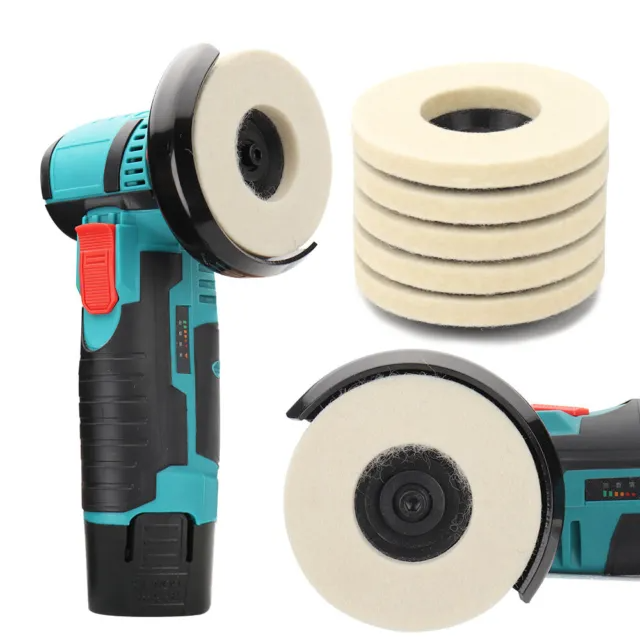
Popular among industrial units and DIY enthusiasts alike, wool felt polishing wheels are widely used to polish surfaces to a shiny, smooth finish. Developed from high-grade compressed wool and known for their denseness and durability, these wheels work well with a variety of materials, including but not limited to metals, glass, stone, and plastic.
Steps to Using Wool Felt Polishing Wheel:
1. Choosing the Right Wheel:
Wool felt polishing wheels come in a variety of sizes and thicknesses. Choosing the right size depends on the surface you need to polish. While smaller wheels are ideal for intricate, detailed works, large wheels work best for extensive and flat surfaces.
2. Preparing Your Wheel:
Before starting, ensure your wool felt polishing wheel is clean and free of any previous polishing compound residues. Soaking the wheel in warm soapy water and gently brushing off any remnants can do the trick. After cleaning, ensure that the wheel is completely dry before use.
3. Applying the Polishing Compound:
Select a suitable polishing compound according to the material you’re working with. To ensure even application, spin the wheel on your polishing machine and gradually apply the compound on the edge of the spinning wheel.
4. Starting the Polishing Process:
With safety goggles and gloves on, hold your piece against the spinning wheel. Ensure you stable your hands to prevent the object from flying off due to the wheel’s speed. Move your workpiece back and forth against the wheel, applying gentle but steady pressure.
5. Checking Your Work:
After a few minutes of polishing, switch off your machine and check your workpiece. If it lacks the desired shine, reapply the compound and repeat the process. Remember, the key to a mirror-like finish is patience and repetitive polishing in stages.
6. Cleaning Up:
Post the polishing process, clean your workpiece with a dry microfiber cloth to wipe off excess compound and reveal a final glossy finish.
Conclusion:
Working with a wool felt polishing wheel can open up a world of possibilities for anyone willing to learn and master the skill. Whether you’re a DIY enthusiast looking to take up a new hobby or a professional aiming for that perfect finish, understanding the correct usage of the wool felt polishing wheel will grant you control, efficiency, and quality in your work.
Always remember that the best companion to an effective wool felt polishing wheel is patience and care in your craftsmanship. As you gain more experience, you’ll be better equipped to handle different materials and achieve the surface finish you desire.
Sources:
– Metalwork Manufacturers Association
– DIY Metal Crafting Enthusiasts Handbook
– Industrial Finishing Best Practices Publication
– Wool Felt Polishing Tools Retailers’ Guide


